Highlighting and contouring are two important makeup techniques that can bring out your features and elevate even the simplest look. These techniques were not so popular until some fashion icons began to talk about them on social media. Today, every fashionista wants to include these techniques in their DIY makeup routine. However, with so much inspiration available online, it is easy to get confused. In this guide, we will help you learn the important basics of contouring and highlighting for recreating that flawlessly radiant look.
Before we proceed, it is important to get your hands on the right tools and cosmetic products that necessary to contour and highlight your face perfectly. So here they are:
- A powder brush
- An angled contour brush
- A concealer brush
- A makeup sponge
- Foundation
- Concealer
- Face highlighter
The Basic Rules of Contouring and Highlighting
With these essentials in place, you are all set to begin your contouring and highlighting journey. Here are a few basic rules to play by:
#1. Know Your Face Type
Your face type will play an important role in determining what your highlighting and contouring approach should be. For each face shape, there are different contour and highlight points. Basically, there are six types of face shapes – long, round, oval, square, heart, and round.
For a round face, a contour on cheekbones will help highlight cheekbones. Likewise, for a long or narrow face, contour on hairline, forehead, and chin will help smoothen angular aesthetics. So, before you assemble the brushes, foundation and highlighter, take some time to determine which category your face fits into and prep your skin accordingly.
#2. Foundation, Concealer, Powder for Contouring
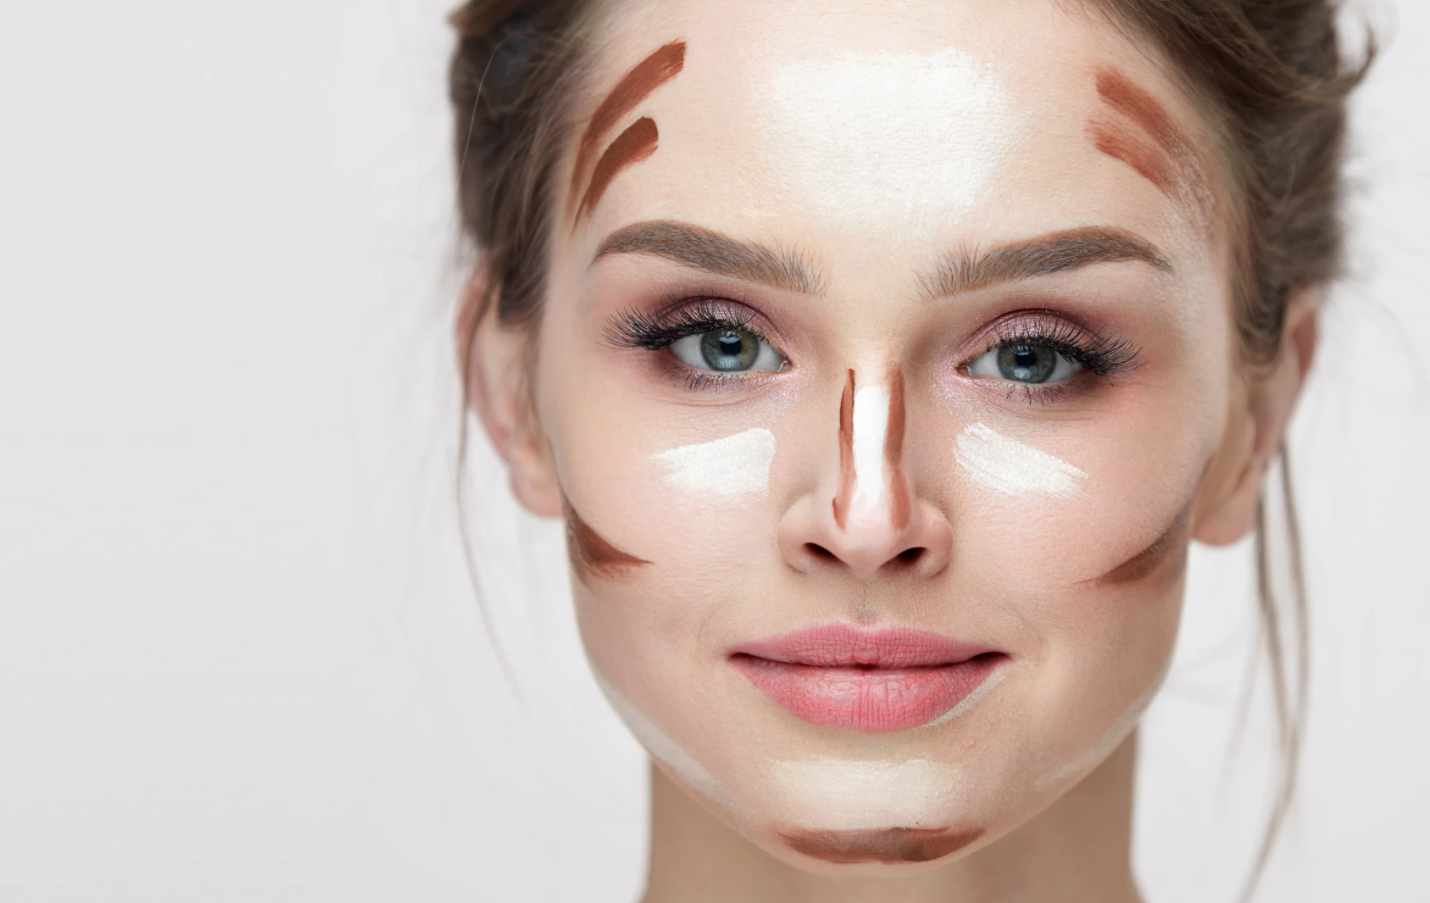
For contouring, use a foundation, concealer, or powder products. If you wish, you can also use a combination of three. To get that perfect radiance, use a concealer that is one or two shades lighter than your skin, and another that is one or two shades darker than your skin.
Use the lighter shade beneath your eyes, middle of your forehead, bridge of your nose, and chin. Then, use the darker shade on areas such as jawline, temples, hollows of cheeks, and forehead edges to enhance the depth of your facial features.
#3. Blend, blend and blend!
Here you have the most important step. Grab your blender sponge and blend all lines that you have created in the previous step. Keep at it till you get a near-perfect natural look. After completing the blending, apply a translucent powder. This will help settle down your makeup effortlessly, besides ensuring that it lasts longer. Follow this step only if you are using a cream or foundation for contouring. However, if you have used powder for the purpose, then you can skip this step.
#4. Highlighting
Highlighters are available in different colors and shades. For a natural appearance, use one that is the same shade as your skin tone. The prominent areas where you should consider applying highlighter include your nose bridge and tip, around the temples, on the chin, and cupids bow. To enhance the effect, you can go a step ahead and highlight the corner of your eyes and the brow bone. Highlighting accentuates your makeup with a dewy effect.
There you go, girl! Just complete the rest of your makeup and you’re all set to sport a well-contoured face that accentuates your best features.


