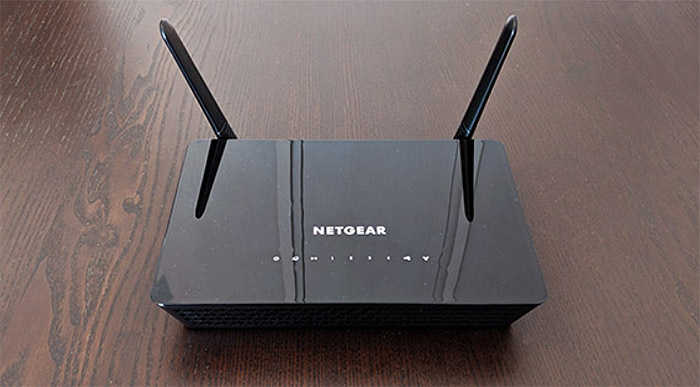
No wonder Netgear is a prime brand when it comes to wireless wi-fi routers. Netgear has all kind of routers, from being cheap to a high-end gaming set. The AC1200 belongs to a more affordable section with great features that justify the price point. This is a dual-band router that runs on the standard 802.11 A/C wireless configurations, with an overall theoretical speed of 1200 Mbps and a good network range of 1200 sq ft. As mentioned in Notontop’s review of Netgear AC1200, this is an excellent choice if you are looking for an entry-level router for your home network while you are on a budget.
Set-Up Guide for Netgear AC1200
The Netgear AC1200 is pretty easy to set up like most modern routers these days. With an intuitive interface and detailed instructions, you can set up the router and accessories with the following methods.
How to Setup Netgear AC1200 WiFi USB Adapter?
The Netgear AC1200 Wi-Fi USB Adapter is a dual-band USB 2.0 WiFi adapter that provides a total throughput of 1200 Mbps. The adapter supports MU-MIMO technology and BeamForming that integrates an internal antenna in a nano format. The package contains the adapter and the resource CD. The adapter has a small LED light that indicates connection status as you insert the adapter into the USB port of your PC/MAC.
For Windows 10, Windows 8.1, Windows 8, and Windows7, follow these steps.
- Insert the resource CD in your computer’s CD drive. The NETGEAR Resource CD window opens.
- Click the Install Windows Driver button.
- All Windows drivers are installed on your computer.
- Wait for the installation windows to show that the drivers are successfully installed.
- Now you are ready to insert the adapter into your computer’s USB port.
- The adapter device driver software for your Windows version is installed.
- Connect your adapter to a WiFi network using a built-in Windows configuration tool.
- Note: If your computer does not include a CD drive, visit Netgear’s official website to download the adapter software.
- If the NETGEAR Resource CD window does not open, browse the files on the CD and double-click the autostart.exe file.
For iMac, follow these steps.
- Insert the resource CD in your Mac CD drive
- Follow the prompts to install the adapter software.
- When prompted, restart your Mac. If you are not prompted, restart your Mac anyway.
- Insert your adapter into your Mac’s USB port.
- The NETGEAR adapter icon displays in your Mac’s menu bar.
- Connect your adapter to a WiFi network using the adapter software.
How to Setup a Netgear Wifi Extender AC1200?
The Netgear Wifi Extender helps extend your AC1200’s connectivity range to enable a more extensive coverage. The following instructions will help you set up your extender.
- Plug in your extender. Connect your computer or mobile device to the extender’s WiFi network. The extender’s default WiFi network name (SSID) is NETGEAR_EXT. It has no password or router’s default password.
- Launch a web browser and enter mywifiext.net.
- As the new Extender Setup page displays, click or tap NEW EXTENDER SETUP. If prompted to accept terms and conditions, click or tap YES or I AGREE.
- Choose your extender’s admin credentials and Select and answer two security questions from the drop-down menus.
- Click or tap NEXT > Tap YES or CONTINUE.
- Select the radio buttons for your network’s 2.4GHz and 5GHz WiFi Network Names (SSID).
- Click or tap NEXT. Enter your existing network’s password and click or tap NEXT.
- Select SSIDs and passwords for your extender. Click or tap NEXT.
- On a device that you plan to connect to the extender network, go to the WiFi settings and connect to the extender’s new network.
- Go back to your web browser, select the checkbox at the bottom of the page, and click or tap CONTINUE. Congratulations, now you can enjoy the extended range.
Note: We recommend leaving the default User Name as admin and choosing a different password from your WiFi network password.
For mesh extenders, you have an option to use the same WiFi name and password as your existing network. Select the Enable One WiFi Name check box to enable this feature if your extender supports it.
How to set up NETGEAR router using the router web interface?
Though Netgear offers a user-friendly web interface, it is a bit slow and outdated for today’s standards. You can set up the router through these simple steps.
- As the Netgear AC1200 gets automatically detected as you turn it on, click to connect to your PC.
- An automatic Netgear Genie software will pop up confirming the connection.
- Click on the “yes” button, and the Netgear Genie Setup Wizard will appear. Within a minute, this Setup Wizard will configure and check your internet connection.
- Afterwards, it will automatically configure DHCP and wireless configuration settings.
- After completing the set-up, the wireless router is ready to use.
Note: For other settings and customisations, you can download the dedicated software Netgear Genie and ReadyShare.
Overall, the Netgear AC1200 is one of the best affordable routers in the market, with an equally easy set-up. With dedicated software support, you can enjoy many customisation options like guest network, block list, etc.


